How You Might Still Be Able to Use Your Master Socket After Switching to VOIP

The United Kingdom is in the process of retiring analogue phone lines. This means that if you still have a landline in your home, you either have been, or you will be, switched over to VOIP — also known as a digital phone line — by the end of January 2027.
VOIP uses the Internet to send and receive phone calls, unlike an analogue line, which relied on traditional telephone exchanges.
After moving my broadband from NOW Broadband (which was still using fibre to the cabinet, FTTC) to Vodafone’s full‑fibre service (FTTP), my landline was automatically migrated to VOIP as well.
The problem?
Full fibre broadband no longer uses the copper wiring inside your home — including the master socket. Instead, a fibre‑optic cable is run from the local exchange straight into your property. As a result, if your broadband package includes a phone service, your phone must now plug directly into the back of the router rather than into the master socket.
For many people this is fine, provided the router can be placed somewhere sensible. In my case, however, the router ended up in a cupboard under the stairs.
Why?
My home is a fairly new build, around ten years old. The underground conduit that carries the cables runs from the pavement, under the driveway, and emerges at the side of the house before feeding directly into the cupboard under the stairs. From there, the internal cabling runs through the walls into the living room, where the master socket is located.
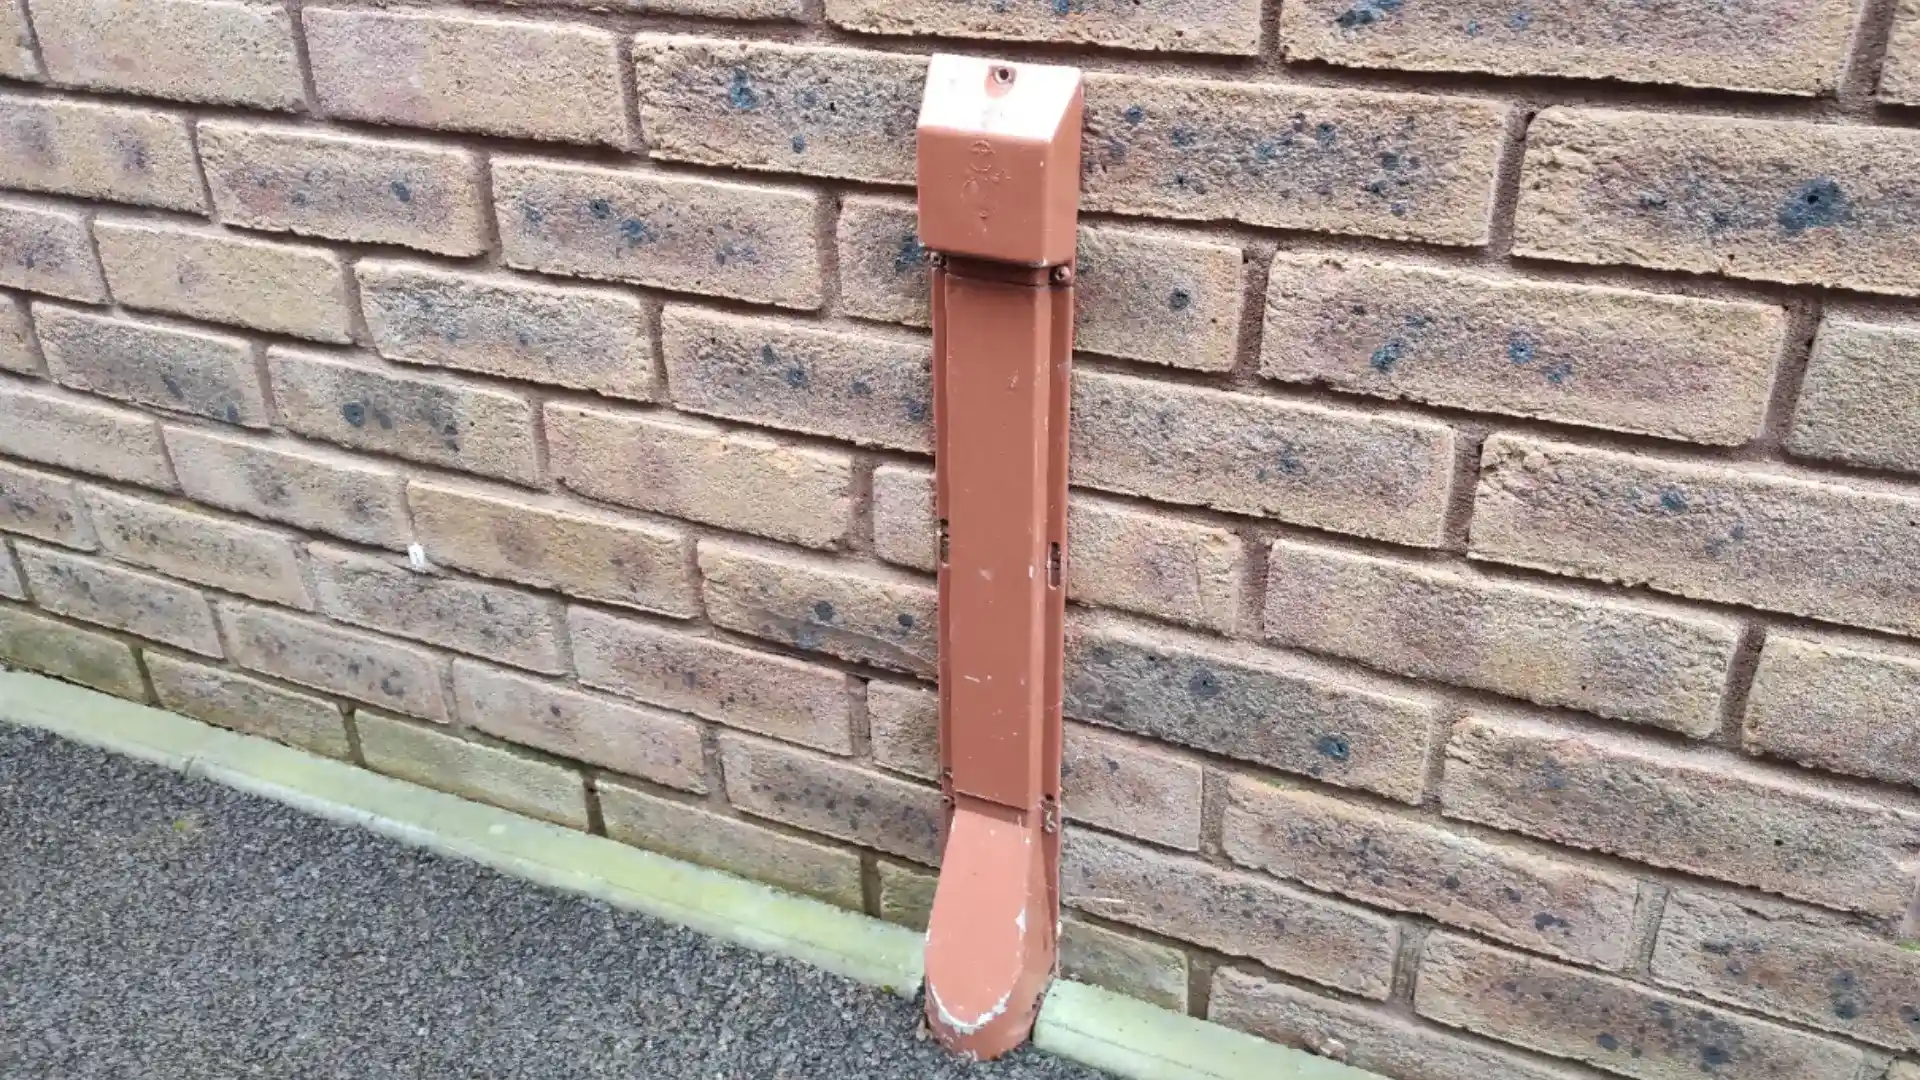
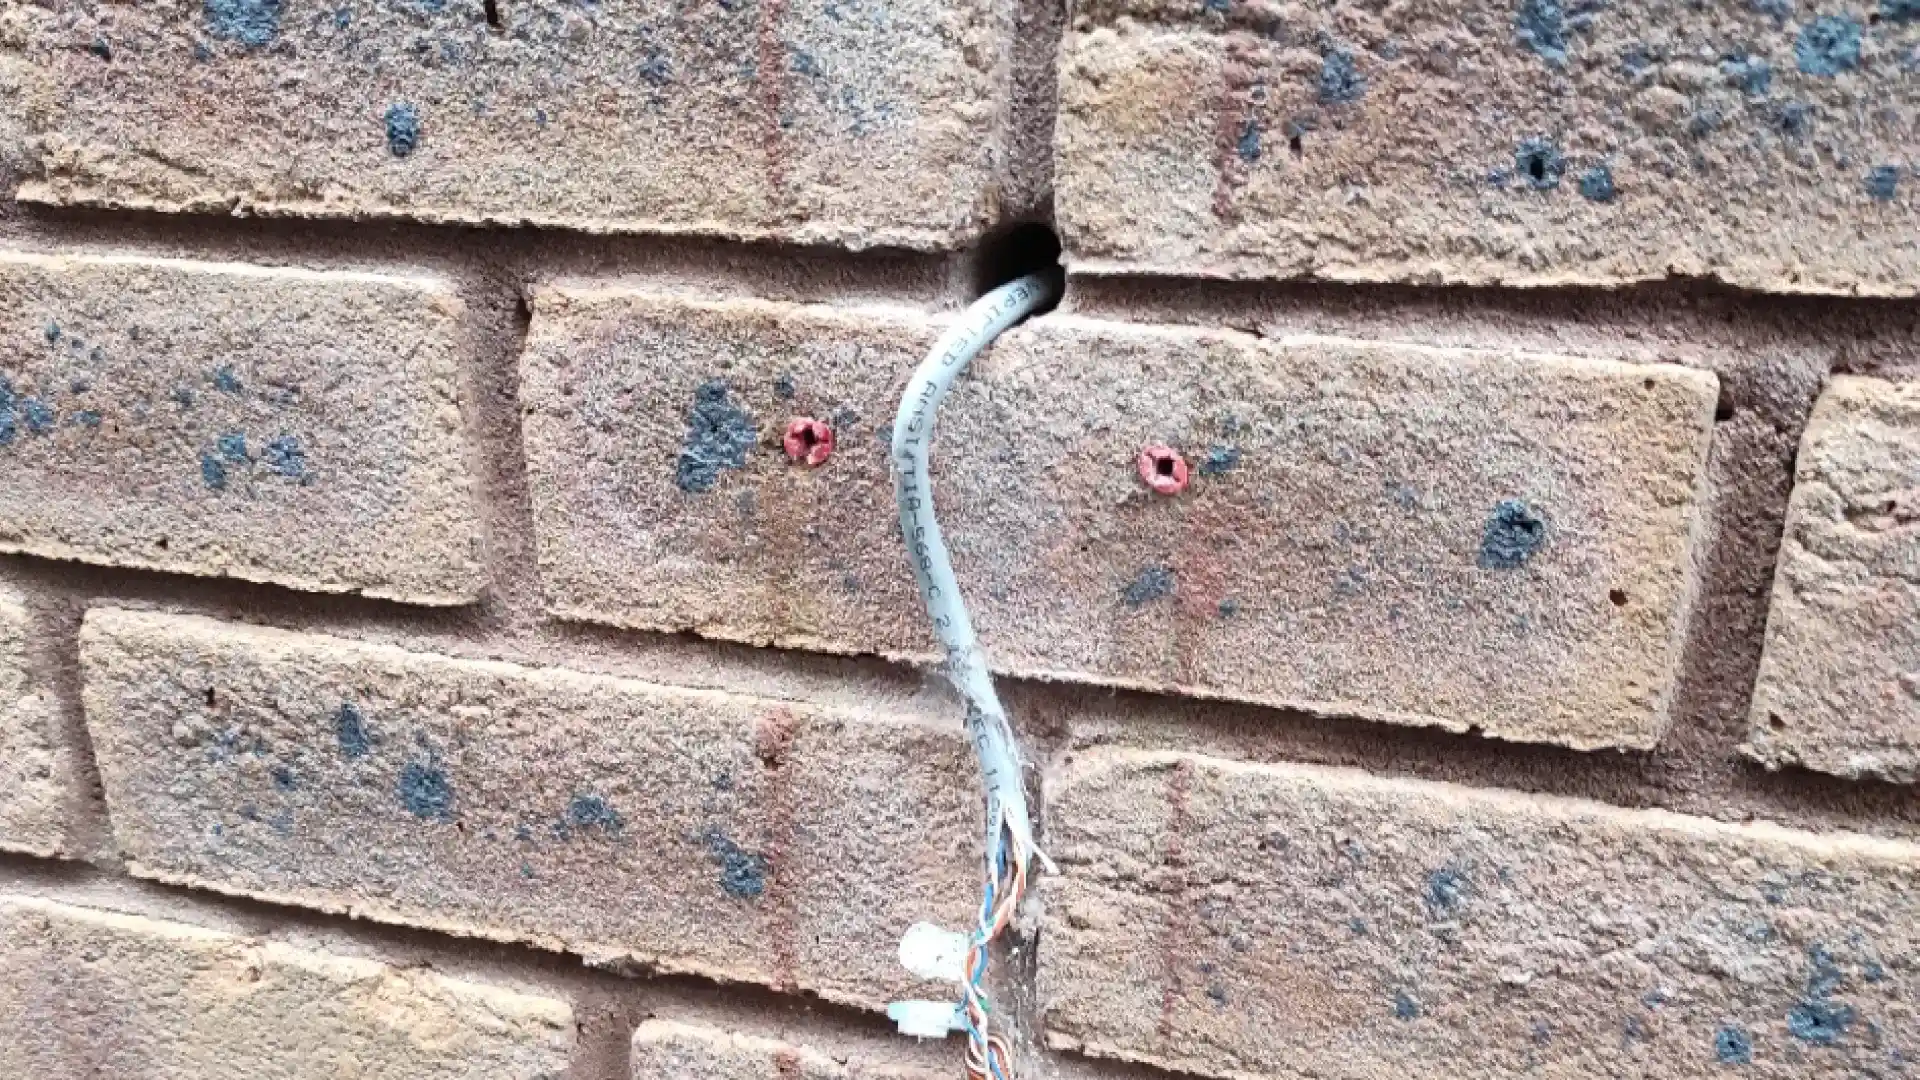
The original copper cabling behind the plastic housing, and with the housing removed, before being replaced with full fibre, in the third image.
If conduit already exists, BT Openreach will almost always use it rather than dig up your garden. It’s faster, easier, and cheaper for them.
Unlike FTTC, full fibre also requires an Openreach modem (an ONT). The fibre cable connects directly to the ONT, and the ONT then connects to your Wi‑Fi router using a standard copper Ethernet cable.
My problem?
The ONT is fixed in the cupboard and cannot be moved. Some people can simply run a long Ethernet cable from the ONT to the router in their preferred location, such as the living room. Others keep the router where it is and run a long telephone extension cable from the router to wherever the phone is kept.
Neither option was viable for me. The hallway has laminate flooring, so there was no practical way to run a cable from the cupboard into the living room without leaving it exposed across the floor — unsafe and unsightly.
So, what did I do?
Inside the cupboard were two faceplates: one blank and one with a phone socket. Removing the phone faceplate revealed that it wasn’t connected to anything. Instead, it contained the cable that came from outside and eventually ran to the master socket in the living room.
The blank faceplate hid a second cable. At first I had no idea what it was for, but after removing the faceplate from the master socket in the living room, I discovered it was a spare cable that could be wired to the extension terminals. This would create a second live socket in the cupboard — most likely intended for an alarm system.
Whoever installed it originally should have put the blank faceplate over the wiring that came from outside, and wired the second cable to the phone faceplate, but for whatever reason they didn’t.
The cable coming in from outside wasn’t a single solid cable but was split in two. It consisted of several thin copper strands, though only two were used, and these were joined together with jelly crimps.
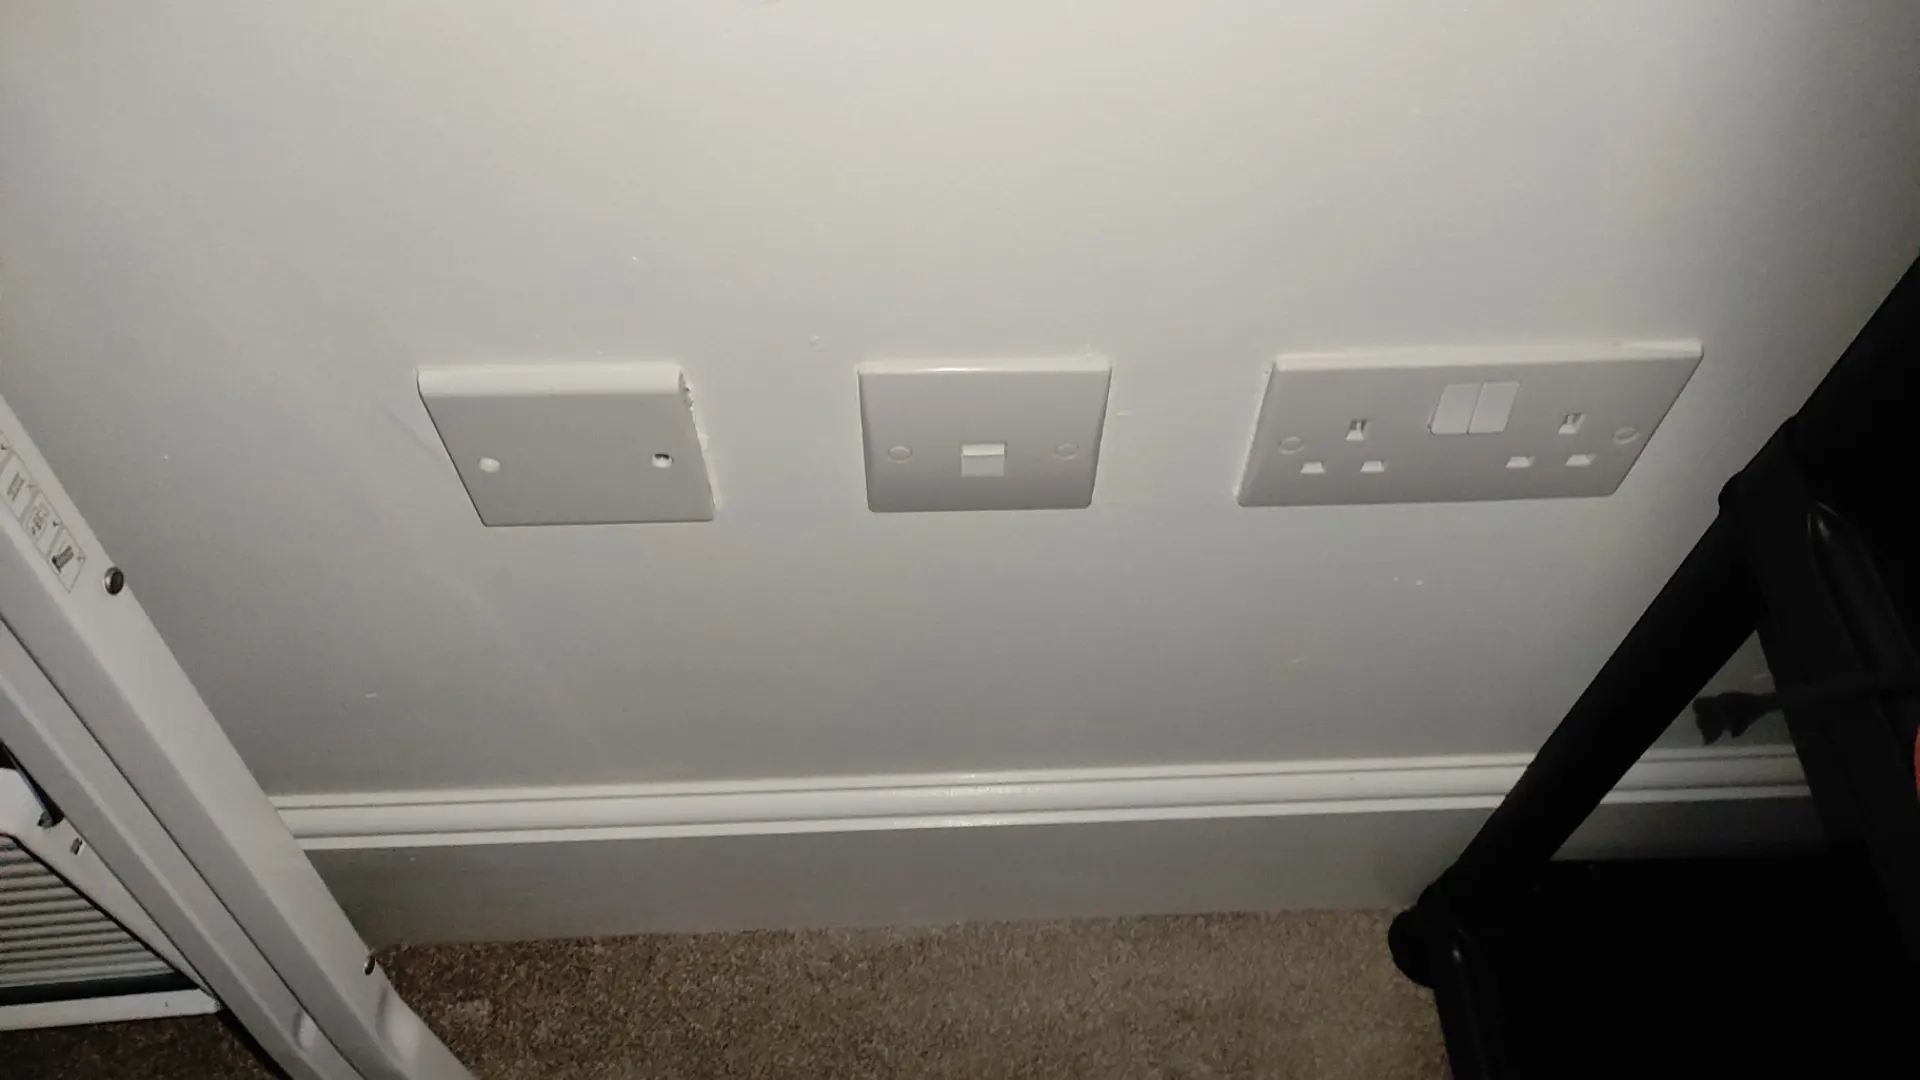
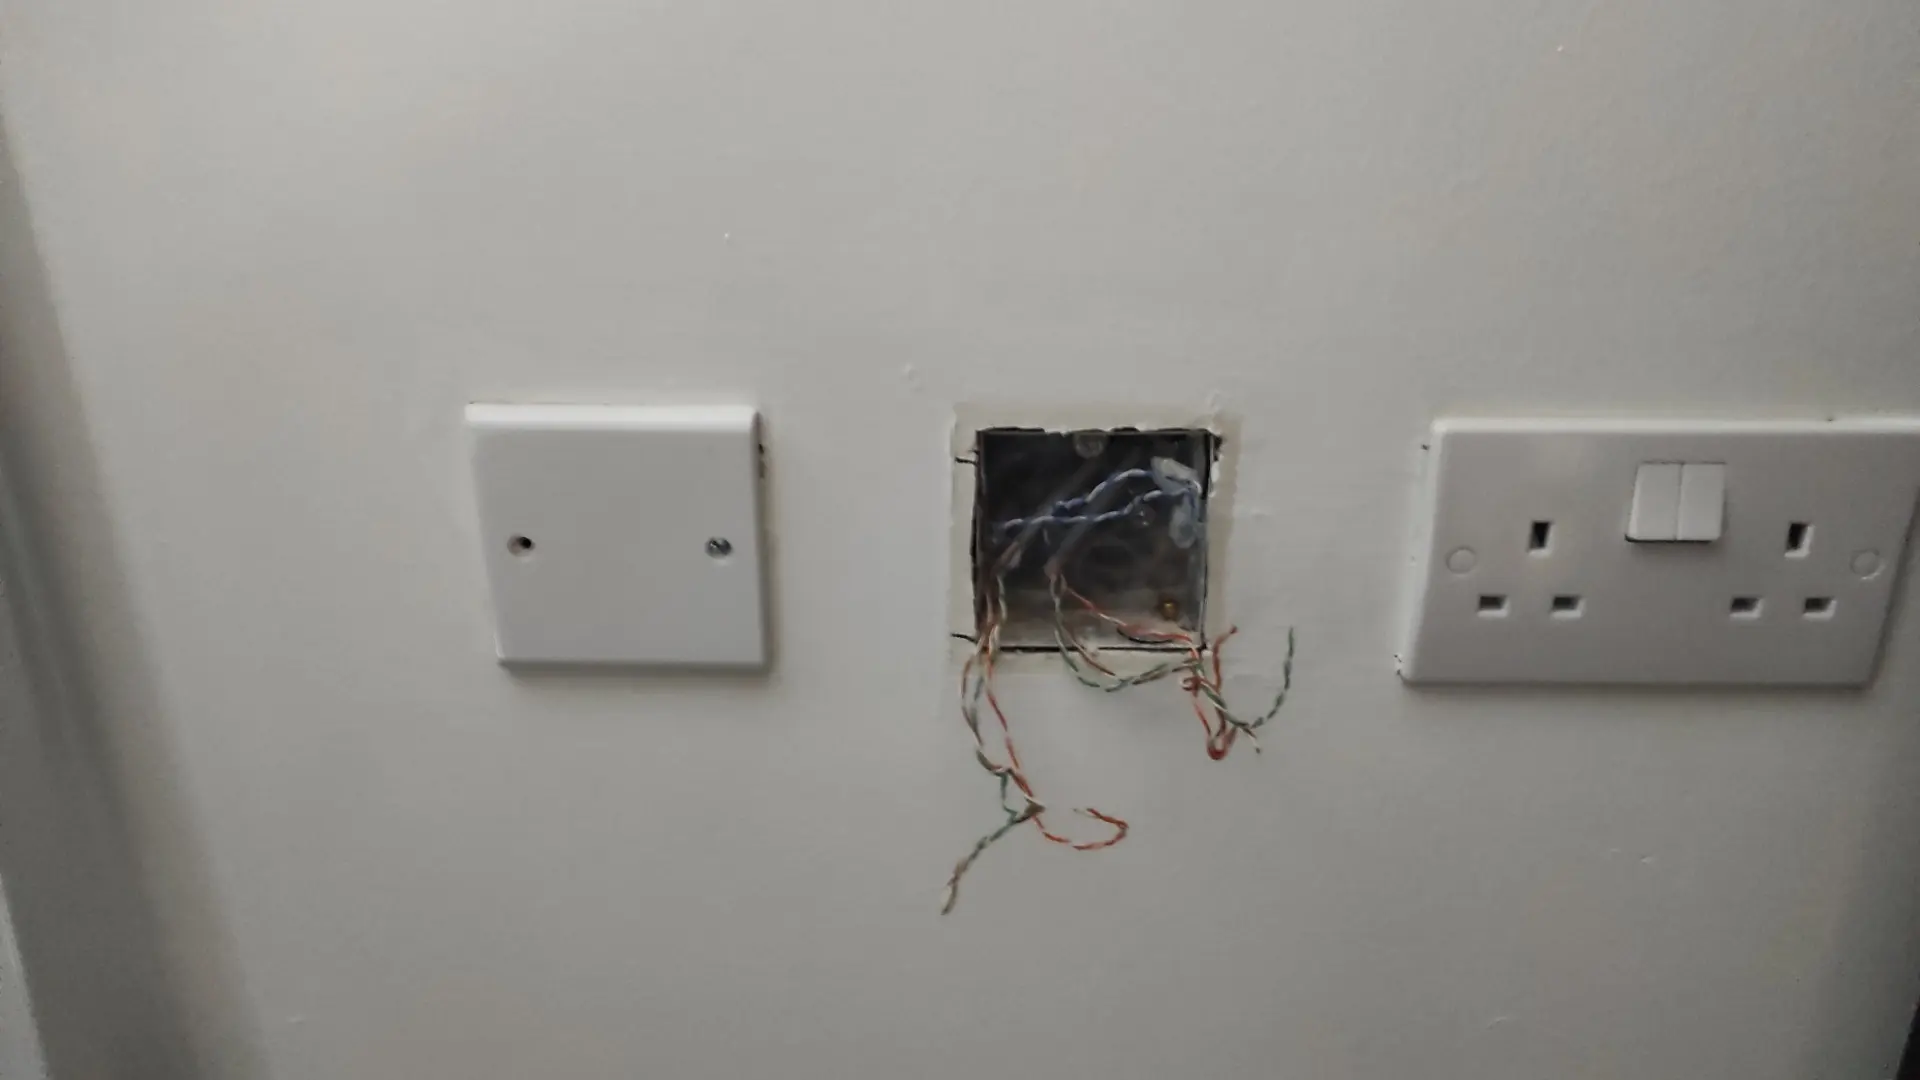
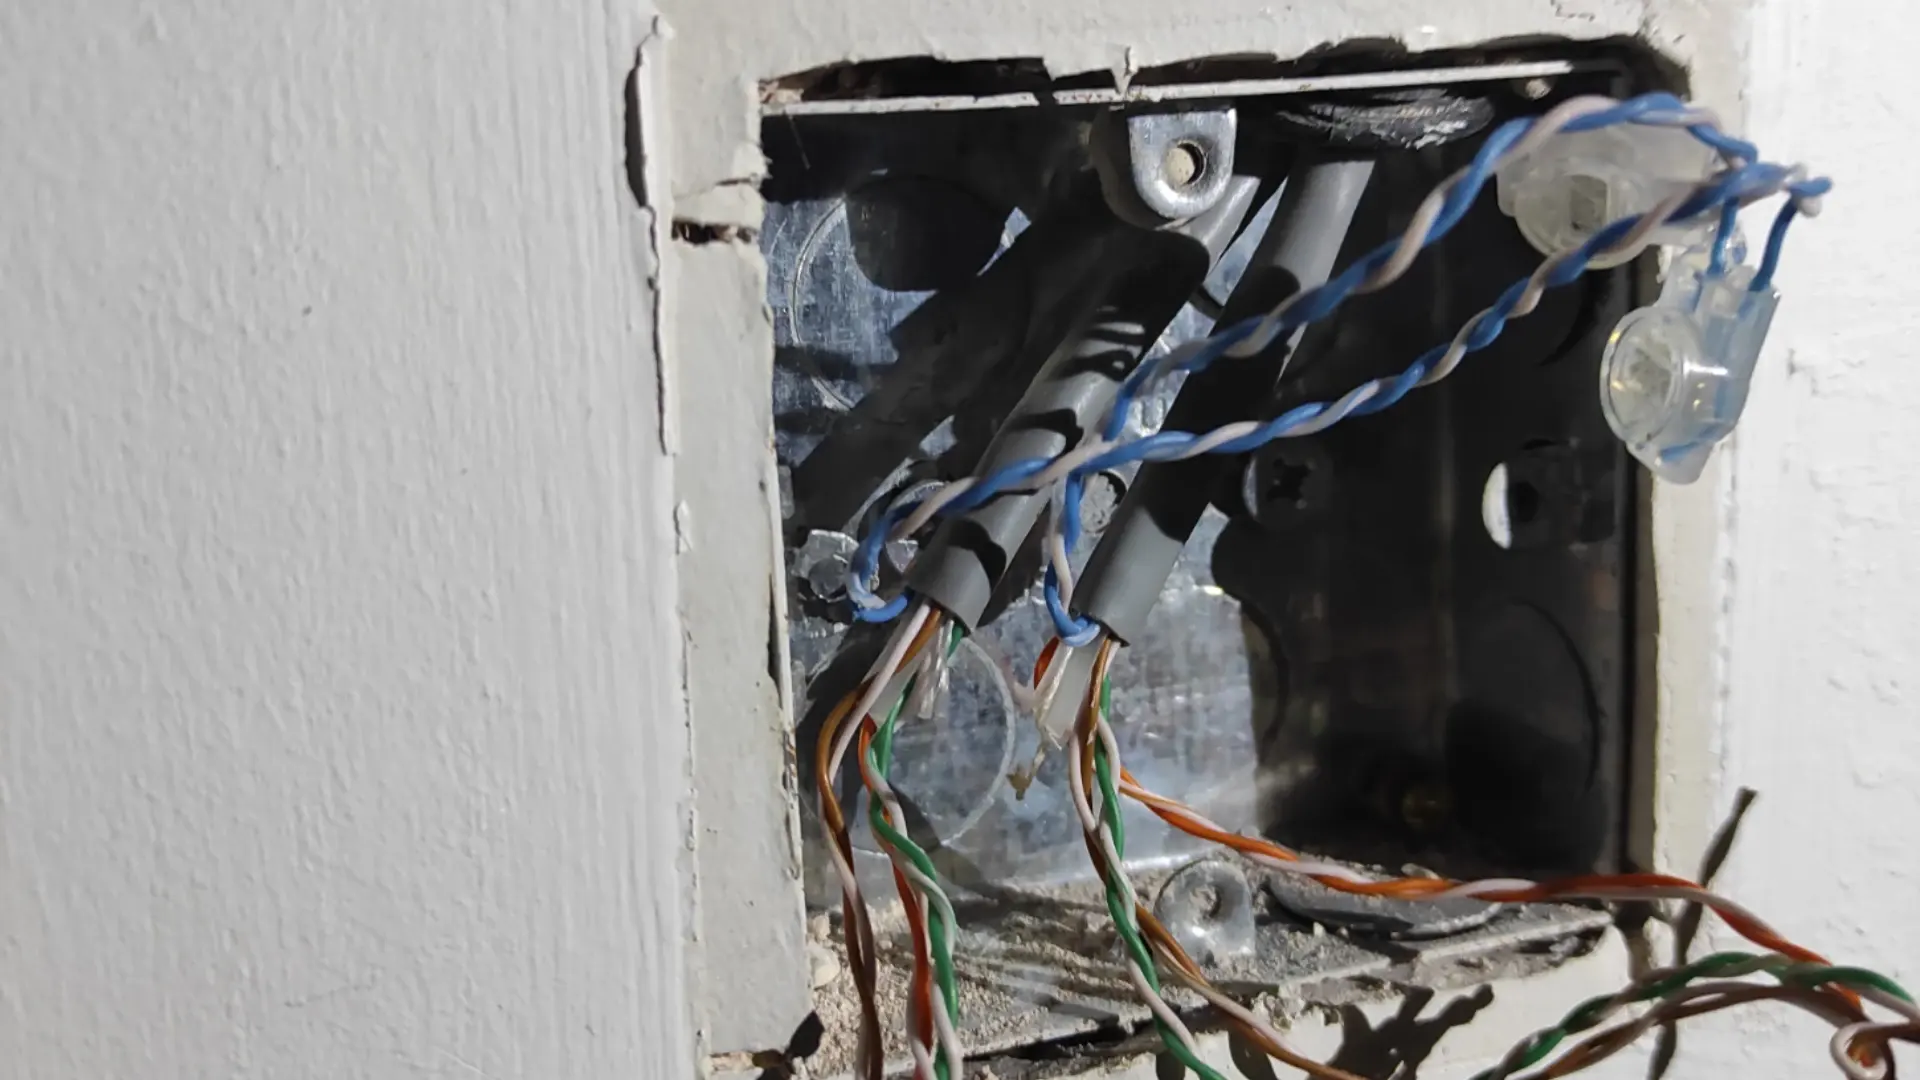
Two faceplates sit in the cupboard under the stairs. One is a spare socket that can be wired to the master socket. The other contains the cable that comes from outside into the cupboard, and then runs on into the living room’s master socket.
Even though the Openreach engineer removed all the old copper cabling that ran under the driveway — meaning I can never return to copper‑based broadband or phone services — none of the internal wiring that fed the master socket was touched.
So I wondered: could I simply repurpose the existing internal cabling as a ready‑made extension for the VOIP line?
Despite searching high and low online, it was difficult to find a clear answer. A few YouTube videos mentioned the idea, but none explained it properly.
In the end, I decided to try it myself, unsure whether it would work. It did — and it turned out to be surprisingly simple, costing me only around £10.
Now, I must stress that this tutorial will only work for people who have access to the internal wiring — i.e. a faceplate or service hatch that gives access to the old copper cables running from outside into the home. I should also add that you’re not supposed to tamper with BT‑owned cabling or the master socket, but as I’ve already explained, the external copper cabling had been completely removed and the internal wiring was now entirely redundant, so it was impossible to damage anything.
What I bought!
Before my full fibre service went live, I bought two items:
- A 3‑metre cable to run from the router to the phone faceplate in the cupboard. The faceplate requires a BT‑style plug and so did my router, but depending on your router you may need a BT‑to‑RJ11 cable, so check before buying.
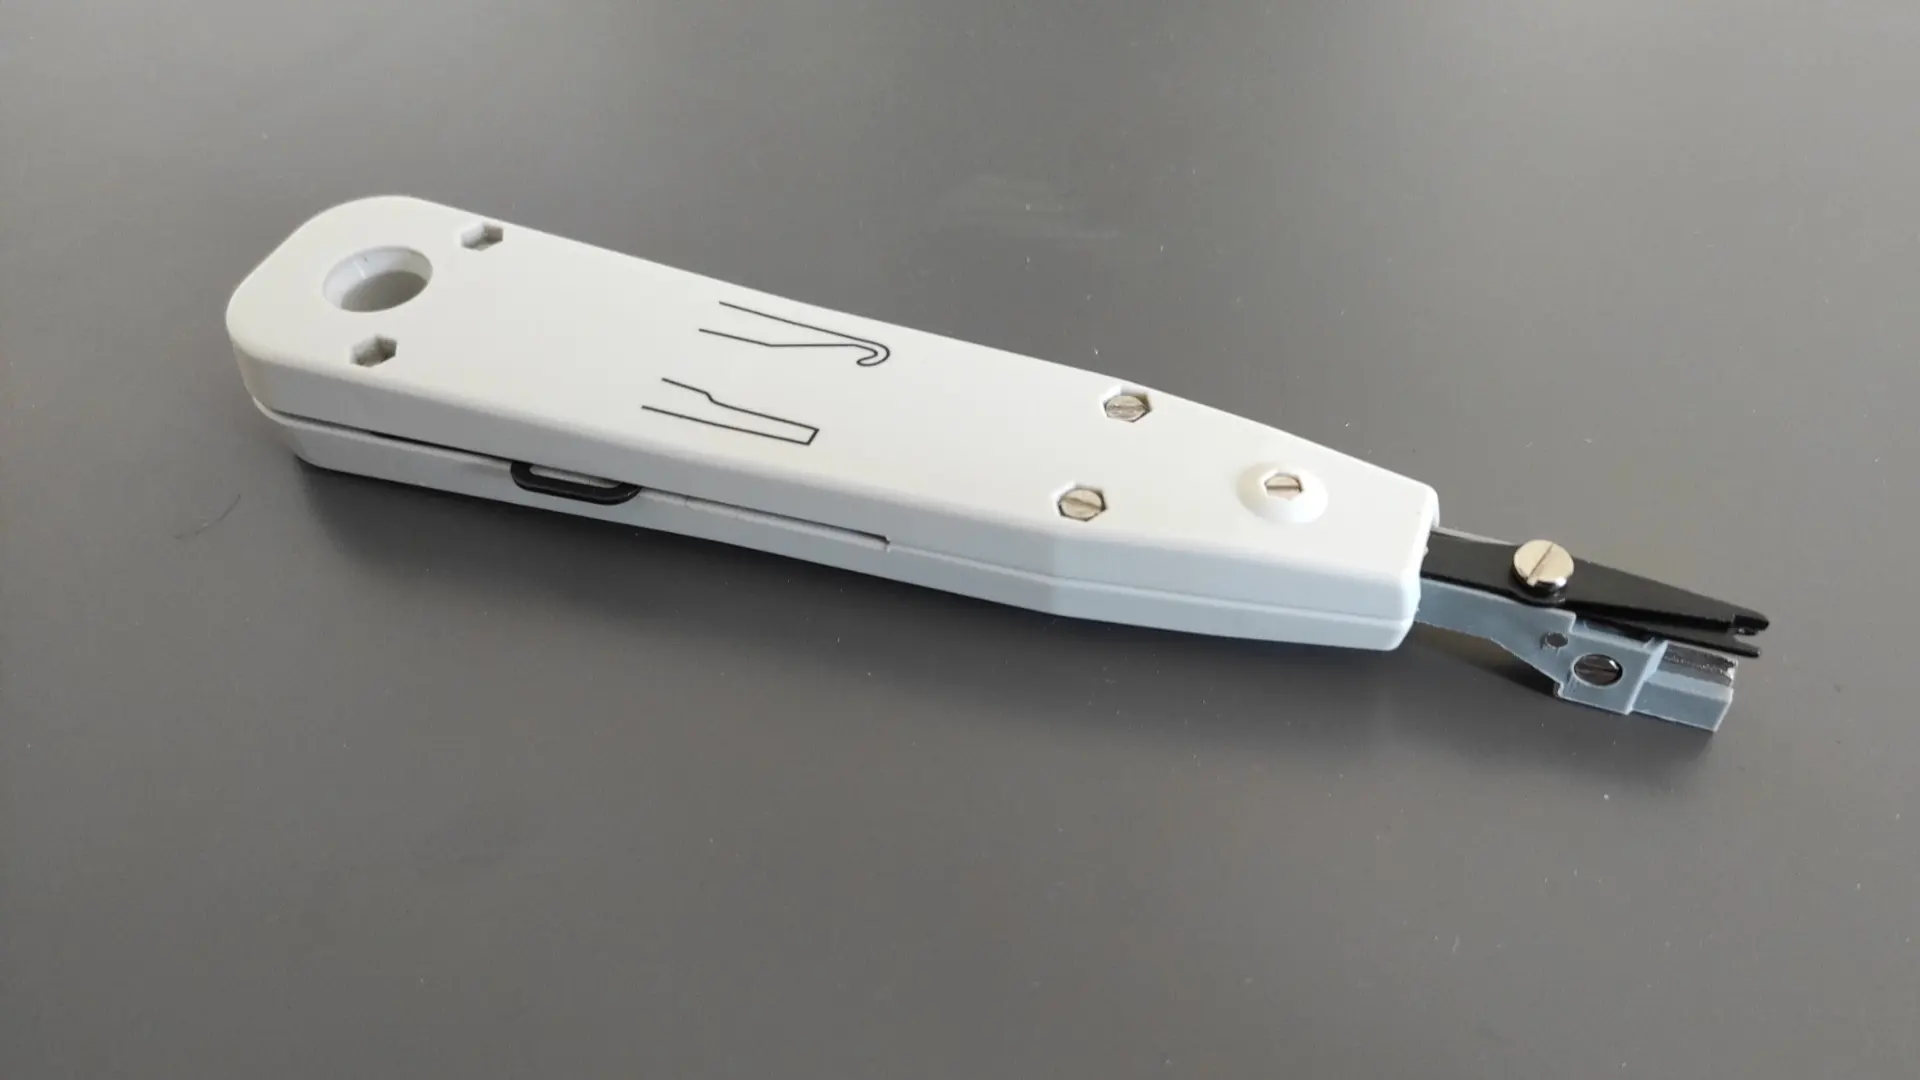
- A Krone punch‑down tool to connect the wiring to the phone socket faceplate.
I didn’t need to buy a new phone faceplate because I used the one already in the cupboard, but they only cost about £5–£7. You can also buy versions with screw terminals instead of punch‑down connectors, but you’ll need to strip the insulation from the very thin copper wires, which can be fiddly. I recommend the punch‑down type, as it’s quick and easy.
Wiring time!
I didn’t need to touch the master socket, as it was already wired. All I had to do was disconnect the cable that originally came from outside and rewire it into the phone socket faceplate in the cupboard.
As mentioned earlier, the cable coming in from outside wasn’t a single solid cable but was joined to a second cable already inside the house. These cables contain multiple strands of copper, of which only two were joined together using jelly crimps — specifically the white strand with blue stripes and the blue strand with white stripes.
In older properties you may find three or four strands connected, but generally only two are needed. If your wiring uses different colours, you may need to do a little research, or simply remove the master socket faceplate and note which colours are connected to which terminals.
For me, the hardest part was identifying which cable came from outside and which cable ran up the wall into the living room, as both entered the cupboard at the same angle. I made an educated guess, severed the strands from the jelly crimps, and used the punch‑down tool to connect the white‑with‑blue‑stripe strand to terminal five, and the blue‑with‑white‑stripe strand to terminal two.
You don’t have to prepare the cable strands; simply lay them across the terminals, push them down with the punch‑down tool, and the metal blades inside the terminals automatically make contact with the copper core.
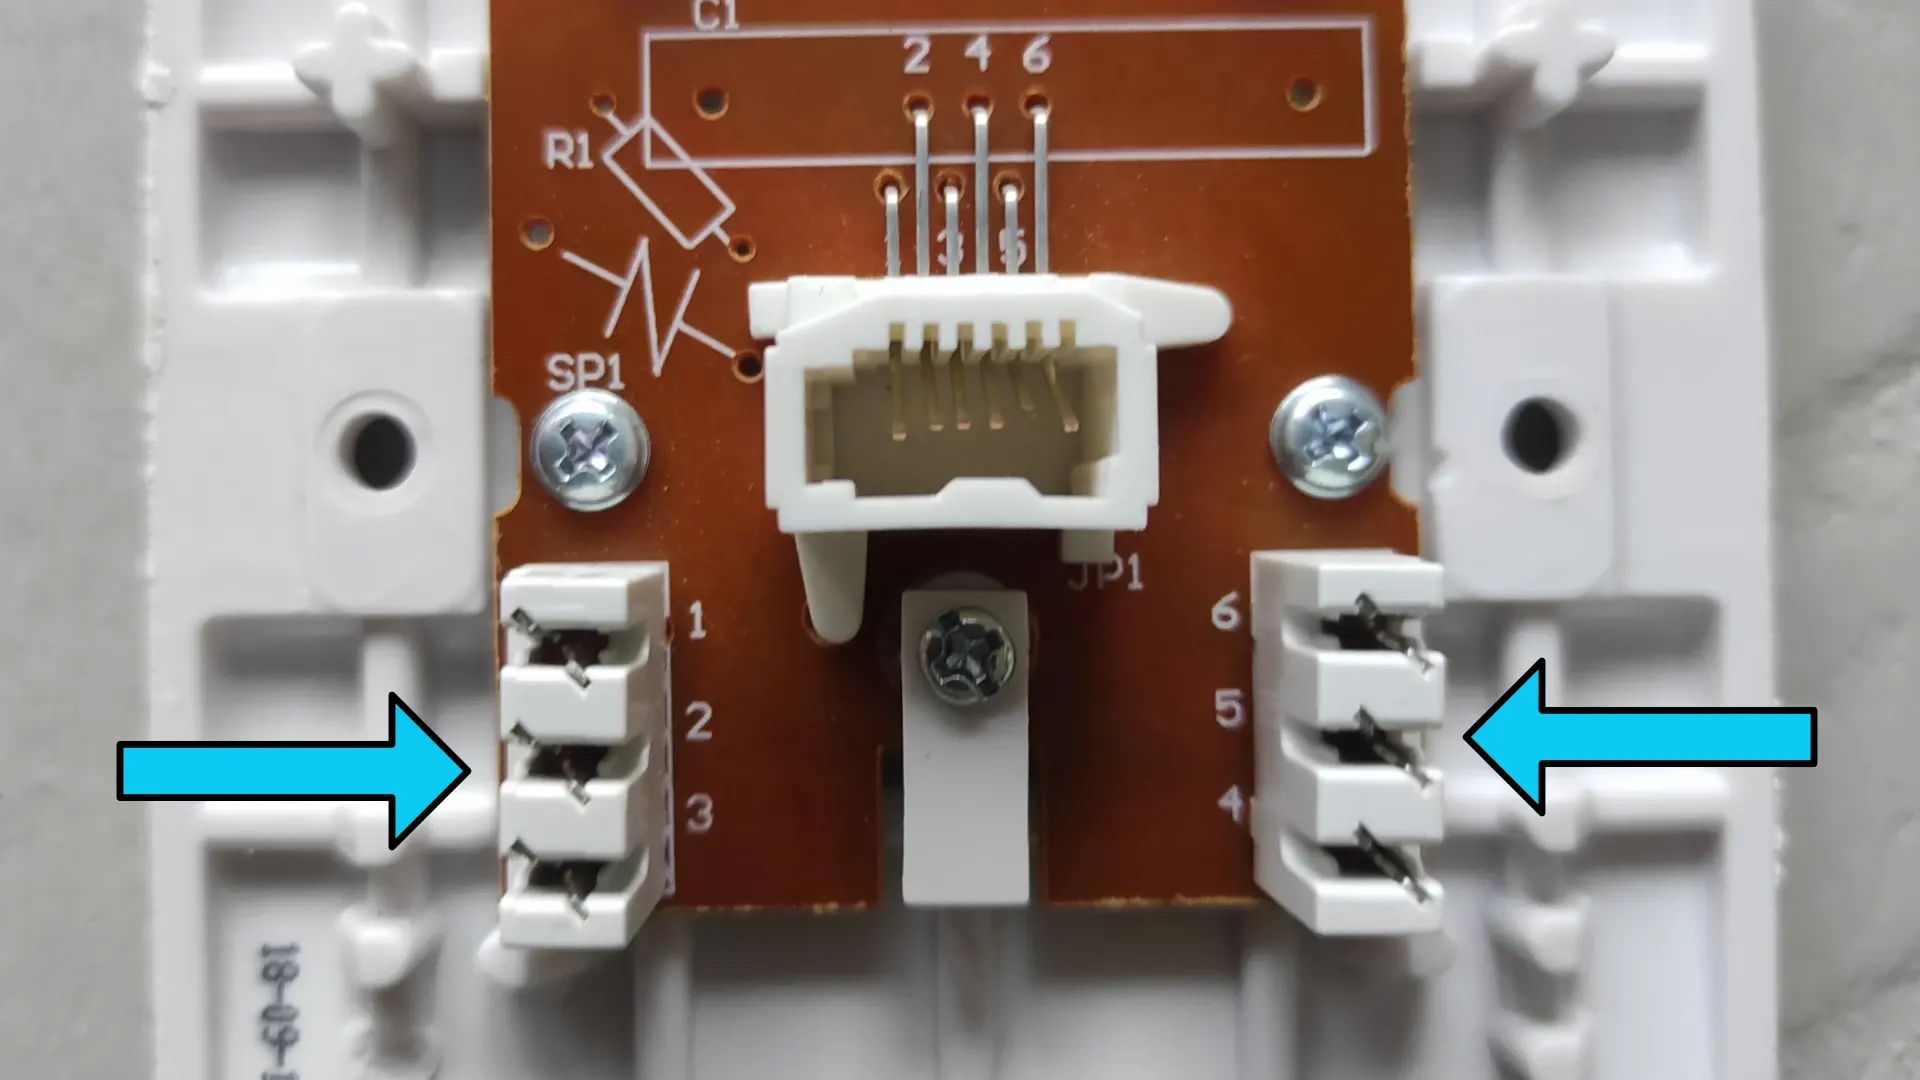
I refitted the faceplate, connected the cable between the faceplate and the router, powered up the router and waited for it to sync. I then removed the now‑redundant microfilter from the master socket, plugged the phone directly into it, and checked for a dial tone.
To my relief, there was a dial tone. I tested incoming calls using my mobile, then outgoing calls, and everything worked perfectly. Later that day I received my first VOIP call, and the setup continued to work without issue.
And that was it.
I found a way to avoid keeping the phone in the cupboard by reusing the existing internal wiring. It cost very little, took about ten minutes, and solved the problem neatly.